Extended Trips / Thru-Hike Packing List

Extended Trips / Thru-HikE Packing List

How to Use This List

In my Standard Gear Packing List I opened with a joke about how you can really get a backpacker going by talking gear. This is even more accurate when engaging a thru-hiker on the topic. At the risk of kicking the hornets nest, I will do my best to share what I have in my pack when going on a longer adventure. I would consider this list of items to be most appropriate if you plan to hike 100+ miles or 7+ days unsupported. I’m not sure that meets the technical definition of a thru-hike, but it is definitely when you are going to start to feel every ounce in that pack.

As you go through a list like the one below and make your own decisions about what to buy, bring, or leave at home, you may be wondering what an appropriate weight is for you. In general, hikers use a metric called ‘base weight’ as a benchmark to determine whether their loadout is light enough for a particular adventure. Base weight refers to the weight of your fully-loaded pack minus consumables such as food, water, and fuel. Like everything else gear-related, a target base weight will vary based on a number of factors such as trip length, resupply frequency (i.e., the weight of your consumables), weather conditions, and what you are personally capable of carrying. For most thru-hikers, 15 pounds (~7kg) may serve as a decent target. Those serious about ultralight principles may find themselves in the ballpark of 10 pounds (~5kg).

Finally, because this list is presumably for a more advanced audiences I will skip a lot of the commentary and extra fluff included in my standard list. If you are looking for a little more expansive list of what to pack, I would recommend starting with this post: Standard Gear Packing List.


The Big Ticket Essentials

These are the large, must-have items that will probably account for around half of the weight on your back. Size and weight are important to consider when selecting which ‘big ticket’ items will be a good fit for your trip.

  1. Backpack: There are several ultralight backpacks on the market, but they are expensive. In a long trip, you can generally get by with your standard backpack. If you are doing a true thru-hike (several months on the trail) I would definitely consider something like the Hyperlite Mountain Gear 3400 Southwest.
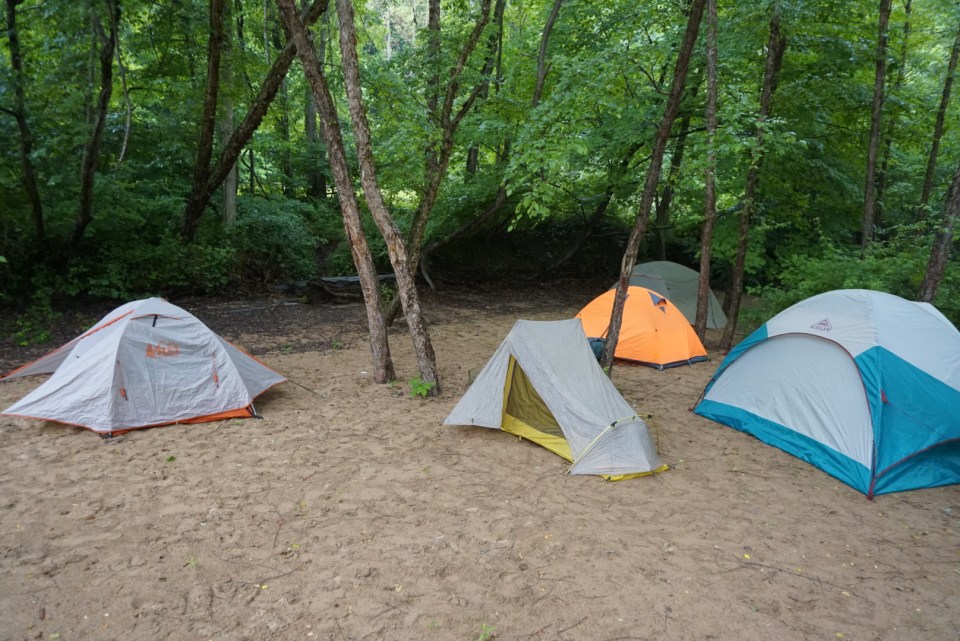
  2. Tent: This is a worthy place to cut some weight. I have typically operated with the Flashlight 1 UL by Sierra Designs or the Fly Creek HV UL2 by Big Agnes. The hardiest of thru-hikers often swear by no-tent solution and will use a tarp supported by hiking poles.
  3. Sleeping bag: This will often be the bulkiest item in one’s pack and is a high potential place to drop pack weight and volume. There are plenty of great bags on the market, but decisions around which is most appropriate for you should be made by taking into account trip length and possible weather conditions.
  4. Sleeping mat: There are several inflatable options that are small, lightweight, and generally more comfortable, but many thru-hikers prefer to carry an egg-crate style mat like the NEMO Switchback as they are more versatile (can be folded into a seat in camp) and durable (can be strapped externally to a pack).

Eating & Drinking

  1. Stove: I highly recommend the miniature MSR PocketRocket if fuel canisters will be available on your trip. If you need a more versatile stove, the MSR Whisperlite Universal can process all types of fuel including “dirty gases” .
  2. Fuel / fuel canister: Portable canisters, if available, are great for the PocketRocket stove. A refillable bottle may otherwise be necessary for storing various types of fuel.
  3. Matches / lighter
  4. Water treatment: I always carry a SteriPen in addition to a water filter. You can cut weight by shifting to the boiling method, but it will slow you down and use up more of your fuel.
  5. Pots / pans / mugs: Consider limiting yourself to a single ultralight pot like the TOAKS 900ml.
  6. Utensils
  7. Water bottles: Many thru-hikers will re-use large plastic water bottles due to their lower weight. Smartwater bottles fit nicely into most backpack compartments.

Other Must Haves

  1. Map & compass: Safety first, even for badass thru-hikers.
  2. GPS / PLB: This goes from a ‘really, really good idea’ to a ‘must-have’ on a multi-day journey. Again, safety first. I love my Garmin InReach Explorer.
  3. First aid kit: One last time for the folks in the back: safety first.
  4. Headlamp: I still use a Black Diamond Spot.
  5. Multi-tool / knife: I still find one helpful for a variety of reasons. Carrying a Leatherman Squirt is a base weight-friendly option for long journeys.
  6. Toiletries: If you are going far enough that “holding it” is off the table, a trowel becomes a must have.
  7. Sunscreen and/or bug spray: Still essentials. You will find a bug net to be lighter than spray.

Comfort Items

One can debate the necessity of items in this section, but a little bit of comfort can go a long way on a thru-hike. These are the items that I keep in my pack on multi-week adventures.

  1. Hiking poles: Though poles are considered optional, I only leave them behind on the shortest of trips. They provide a lot of benefits in terms of stability on uneven surfaces, joint relief when moving downhill, and prevention against swelling in your hands. Savvy ultra-lighters often use them to replace tent stakes as well.
  2. Microfiber towel: In an attempt to preserve some baseline level of hygiene while on the trail, I rarely travel without a mini towel. They dry almost instantly in direct sun and weigh next to nothing.
  3. Body glide: My secret weapon in the constant battle against chafing, I never go more than a few miles without my Body Glide balm. They also make Foot Glide for protecting against blisters.
  4. Solar charger: Likely a necessity to keep your GPS and/or phone charged on a longer journey, Goal Zero and Anker are two popular and well-reviewed brands.

Clothing

The packing list should largely match that of standard backpacking trips minus a few redundant items. I would recommend something like:

  1. Hiking boots: Though trail runners may be appropriate as a lightweight option for many adventures.
  2. 2x socks and underwear
  3. 2x shirts
  4. 2x pants: One short, one long. Shorts with built-in liners may provide some additional value to those concerned about only carrying two pairs of underwear.
  5. Warm layer
  6. Waterproof layer

Additional Ultralight Tips

Here are a few assorted tips for maximizing utility and minimizing space within your pack. For brevity, I omitted some of the sillier, less impactful tricks such as ‘sawing the handle off your toothbrush.’

  • Make a pillow out of a stuff sack and clothes: Inflatable pillows are a luxury best left off the packing list for long-distance journeys. Instead, I will fill the stuff sack for my sleeping bag with leftover clothes and use that for support while sleeping instead.
  • Choose calorically dense foods: Food can account for a significant portion of pack weight, especially if re-supply points are few and far between. To optimize for this, I recommend selecting foodstuffs that are calorically dense. For example: nuts, oats, dried fruits, hard cheeses and energy bars tend to have a much better ratio of calories per ounce than breads, crackers, chips, processed foods, and some pastas.
  • Use a single pot: Dishes outside of a single pot should be considered luxury items and can be left behind. Using one pot for cooking, boiling water, and eating out of is a great way to keep base weight in check.
  • Deconstruct packaging before departing: This may be intuitive, but I always repack my food into Ziploc bags before leaving on a hike. Not only will it save space, but mixing things like my nightly helping of rice and lentils ahead of time can help with portion control and make dinner time more efficient. This logic applies to packing gear as well. I often carry some duct tape with me in case of emergency, but am sure to take a more reasonable amount off the roll to avoid unnecessary ounces.
  • Use a Smartwater bottle: I love my Nalgene, but Smartwater makes large bottles that weight nearly nothing and fit nicely into the mesh pockets of most standard backpacks. They aren’t as durable, so be careful, but they are generally much more efficient weight-wise than other reusable bottles. Large Gatorade bottles are another alternative.
  • Bring just a shell for a waterproof layer / windbreaker: Odds are that if you have a proper warm layer you will just need a thin ‘shell’ to get through your hike. Jackets can be exceptionally bulky so there is no sense in having two heavy insulating layers when one will do. If waterproof pants feel necessary for your trip, the same logic applies.
  • Bring meals that can be ‘cold soaked’: Admittedly, I am not a fan of this approach as I love a warm meal at the end of a long day, but some through thru-hikers may limit themselves to meals that can be prepared through ‘cold soaking.’ Taking this approach significantly reduces base weight by eliminating the need for a stove, fuel canister, and pot.
  • Leave your tent behind: This is another tip that I don’t abide by personally, but creating shelter out of a rain fly and trekking poles does eliminate the need for a bulky tent, saving significant space and weight.

Feedback

What did I miss? Do you have any additional tips for introducing ultralight principles to your loadout? Please let me know your thoughts in the comments below.

Disclaimer: I do not receive any compensation for recommending these products and all opinions / recommendations are solely based on my own experiences

Standard Gear Packing List

Standard Gear Packing List

How to Use This List

If you really want to get a backpacker talking, ask them about their pack and what is in it. Perhaps no topic is more controversial in backpacking sub-culture than what you should carry on your trip. Check out any public forum and you are sure to encounter hundreds of unique responses . In reality, there is only one right answer: it depends. Since you are on this page however, I will provide a little insight into what I usually take with me, in hopes that it helps make your own planning a little easier.

Please don’t take this list as law. Before you go on any trip, ask yourself a few critical questions:

  • Where are you going (woods, mountains, desert, beach, etc.)?
  • What temperatures are you expecting? What is the coldest it could possibly go? What is the warmest it could be?
  • What are the chances of rain / snow / lightning?
  • How long will you be gone?
  • Will you need to resupply food / water? If so, how do you plan to resupply?

Once you have answered these, think about what adjustments you might want to make from this list. If you still aren’t sure, check out one of my other posts in the Gear Guide section of my website for a little extra direction.


The Big Ticket Essentials

These are the large, must have items that will probably eat up around ~70% of the space in your pack and ~70% of the dollars that you have invested in your loadout. While it’s hard to leave any of these items behind, be sure that you have done your research and have items that are a good fit your trip.

  1. Backpack: You can’t go backpacking without a pack but having the right one for your needs can make a world of difference. Size, weight, and personal fit should all be considered. I currently use an 80L Kelty Coyote for large loads and long distances.
  2. Tent: Your home away from home when on the trail. Tents come in all different shapes, sizes, and colors, but in my experience almost any will do. One caveat is that not all tents are free standing, so if camping on surfaces where driving stakes in will be difficult, I would recommend one that is self-supporting. On solo adventures, I have been using the Flashlight 1 UL by Sierra Designs.
  3. Sleeping bag: Critical to ensuring you are warm and cozy at night, a sleeping bag should be brought on all but the warmest of trips. Most bags come with a temperature rating, so make sure the one you carry is cut out for the most extreme weather you could conceivably face. I have been using the Klymit 20F for warmer trips and the Marmot Trestles Elite Eco 0 for colder ones.
  4. Sleeping mat: The item you will spend the most time on outside of your boots, check out my breakdown to learn more about how to pick the perfect mat. Recently, I have been sleeping on the Therm-a-Rest NeoAir Xtherm.

Eating & Drinking

  1. Stove: Whether cooking an extravagant backcountry meal or just boiling water for morning coffee, an outdoor stove is a must for anywhere open fires are not allowed. And sadly, due to the severity of wildfires of late, that is most places. If carrying backpacking fuel, I bring along my miniature MSR PocketRocket. On international trips or those with lots of refueling, I opt for the trusty MSR Whisperlite Universal, which can process all types of fuel including “dirty gases.”
  2. Fuel / fuel canister: Most backpackers prefer the handy portable canisters optimized for popular stoves like the MSR or Jetboil models. If you need something with more versatile when there may not be an outdoor store on your route, you can buy a bottle designed for holding fuel.
  3. Matches / lighter: It’s difficult to use a stove or open fire without being able to light one, so unless you are a primitive survival expert, you’ll want to bring matches or a lighter. If going with matches, consider waterproof ones.
  4. Water treatment: It is never a good idea to drink water directly out of a source, no matter how pure it looks. In fact, many recommend using multiple methods of water treatment as different treatments are more effective at killing bacteria vs. viruses. I always carry a SteriPen in addition to a water filter.
  5. Pots / pans / mugs: Bring what you need and no more. Eating right out of the pot is a great way to save on space and weight in this department.
  6. Utensils: Every backpacker carries a good spork, potentially alongside other collapsible utensils.
  7. Water bottles: Staying hydrated should always be a priority on the trail, so always carry more water than you think you’ll need. If refill points are few and far between, look to additional containers like a HydraPak.

Other Must Haves

  1. Map & compass: Even if you have electronics to guide you, it’s always a good idea to have a map and compass just in case. Make sure you know how to use them (ever heard of declination?); if you don’t, REI and other outdoor shops often offer free classes.
  2. GPS / PLB: On short trips, a map and compass may suffice, but if you plan on stepping far away from civilization you need a GPS or PLB (personal locator beacon). These devices will not just help you find your way but can alert authorities if something goes on. Please do not just rely on your phone, I would recommend products from a trusted brand like Garmin.
  3. First aid kit: Always prepare for the worst and hope for the best. You can buy compact kits designed for hiking and backpacking at most outdoor stores.
  4. Headlamp: Backpacking overnight means finding your way in the dark. Hopefully you are all settled into camp before you take out your torch, but you will want to be prepared either way. I use a Black Diamond Spot, which allows me to power with standard AAA batteries or rechargeable ones.
  5. Multi-tool / knife: While you may be able to do without, you would be surprised how handy they can prove to be. I have used my Leatherman Squirt for everything from opening pesky food containers to fixing a broken stove and backpack.
  6. Toiletries: Bring what you need, but please be mindful of the environmental impacts. Nothing is worse than plopping down in a pristine campsite and then finding an exposed cache of toilet paper. If on longer trips where you will be doing your serious business outdoors, a trowel becomes a must have.
  7. Sunscreen and/or bug spray: Whether these are actually “must haves” depends on the locale, but if you need them you definitely won’t want to forget them. Pro tip, I find a bug net to be more comfortable than spray.

The Comfort Items (Non-Essentials)

  1. Hiking poles: Though poles are considered optional, I only leave them behind on the shortest of trips. They provide a lot of benefits in terms of stability on uneven surfaces, joint relief when moving downhill, and prevention against swelling in your hands. Savvy ultralighters often use them to replace tent stakes as well.
  2. Camp shoes: Nobody likes walking around in smelly boots all day, so lightweight shoes for walking around camp after-hours are can go a long way towards improving comfort levels. They also may offers some utility if there are any water crossings along your route. I love my Tevas, but Crocs are also popular, as are trusty pairs of cheap flip-flops.
  3. Inflatable pillow: Maybe the ultimate comfort item. Expendable on treks where space will be an issue, but key to a good night’s sleep on short trips. If I have room, I tend to bring along my Klymit Luxe pillow.
  4. Microfiber towel: While not technically a necessity, I rarely camp without a mini towel. A quick face wash or sponge bath at the end of the day makes sleeping much more comfortable. They dry almost instantly in direct sun and can also be used to wipe down dishes and other items.
  5. Body glide: My secret weapon in the constant battle against chafing, I never go more than a few miles without my Body Glide balm. They also make Foot Glide for protecting against blisters.
  6. Biodegradable soaps: Handy for cleaning dishes and yourself, soap is usually an optional but nice to have item on the trail. Please protect your environment though and select biodegradable, non-scented products.
  7. Solar charger: Nowadays, almost everyone hikes with some sort of electronics, whether it be a phone, camera, fitness monitor, or GPS. On longer journeys, these may require a solar charger from the likes of GoalZero or Anker to remain operational. Should you be reliant on a GPS for wayfinding, this may be a necessity.
  8. Solar lantern: As a total convenience, I often bring along my inflatable, solar powered Luci Mpowerd on short trips or group excursions. It is relatively compact, can hang from the top of a tent, and casts much broader light than a normal headlamp. It also allows you to look around at others without blinding them.

Clothing

  1. Hiking boots: The key to comfort on the trail is undoubtedly well-fitting boots (have you seen / read Wild?). I love my La Sportivas, but everyone’s feet are different so try before you buy and be sure to break them in before you embark on a long trek.
  2. 3x socks & underwear: Allow for an extra pair just in case “laundry” becomes a challenge. Wool socks are great as they minimize smell retention and prevent blistering. For underwear I prefer synthetic materials as they usually dry faster.
  3. 2x shirts: I tend to bring one short sleeve and one long sleeve. Dry-fit materials are my favorite, but I adjust based on the expected climate.
  4. 2x pants: Again, one short pair and one long. Zip offs are much loved by trekkers for a little extra versatility. If you are looking for a more premium pant, I love my Kuhl Radikls for flex comfort and my Fjallraven Vidda Pros for durability.
  5. Warm layer: Wool or down are generally considered the best materials here. Down is usually lighter and more compact, but it cannot get wet.
  6. Waterproof layer: Rain layers typically double as a wind layer and thus are a good idea regardless of whether precipitation is expected. If you are anticipating very wet conditions, you may also want to consider rain pants.

Feedback

What did I miss? What are other “must haves” or “comfort items” are in your pack? Do you have any tips or tricks to maximizing utility and minimizing space? Please let me know your thoughts in the comments below.

Disclaimer: I do not receive any compensation for recommending these products and all opinions / recommendations are solely based on my own experiences