
Sliding Sands to Palikū Cabin Loop
Haleakalā National Park, Hawaii
Length: 19mi (30.6km)
Days: 2
Difficulty: Moderate (well maintained trail, exposure / weather risk, rough terrain, significant elevation change over short distances)
Gear: Standard
Completed: March 2023
In summary: Fitting a trip to Haleakalā into a Hawaii vacation is no simple feat, especially if you plan to spend a night in the crater. The summit area of the volcano is a few hours from any of the island’s major tourist centers, and most travelers opt to fill their suitcases with bathing suits as opposed to camping gear. Still, it is an experience worth making time for. Stepping into the Haleakalā Crater is akin to landing on a foreign planet. Almost instantly, one forgets the blue waters and sandy beaches of which Hawaii is known and starts to wonder at the isolated, ruddy landscape that is like nowhere else on Earth. As you hike along you may find yourself asking: Is this what Mars looks like? Am I walking through a cloud right now? Was Jurassic Park filmed here? Few two-day treks can match the Sliding Sands to Paliku Hut Loop in terms of diversity of scenery and terrain. Despite its brevity, this trail should not be considered a cakewalk. Sharp and unstable lava rock litter the crater floor, weather conditions are notoriously unpredictable, and the grade of the trail entering and exiting the crater is severe. Nevertheless, spending a night on Haleakalā is an unforgettable experience, and I can promise that if you are the type of person who enjoys reading this blog, you will not regret forfeiting a day or two of your beach time.
The Route

Preparation / Know Before You Go
This route requires a short hitchhike: If you want to turn your trip into a loop instead of a lollipop, you will need to catch a short hitchhike between the Haleakalā Visitors Center and either the Halemau’u Trailhead or Hosmer Grove Campground. While this is optional, I would highly recommend it as the stretch along the Halemau’u Trail is one of the best sections of the park. The hitch itself should not pose you too much trouble if you exit at the Halemau’u Trailhead as there is a designated pickup area and signs notifying drivers there may be hikers in need of a ride. For context, it took us ~10 minutes a hitch. We also picked up a hiker on our way up to the summit who told us he had been waiting ~30 minutes.
Reservations are required for overnight stays: By design, there are very few campsites within the Haleakalā Crater. If you want to experience the magic of an overnight stay, you will want to reserve a permit well in advance. Reservations can be placed for the cabins ($75/night) or adjacent campgrounds (free) on Recreation.gov. Per usual, we stayed in the campground.
Bring a filter: The Haleakalā campgrounds offer very basic services to minimize environmental impact. There are pit toilets and water spigots. The water from the spigots is considered non-potable; thus, overnighters should bring water treatment devices.
Prepare for inclement weather: The weather atop Haleakalā is notorious for being unpredictable. It tends to be 20-30°F (11-17°C) cooler on the summit than at sea level, and conditions can change in a matter of minutes. Over the course of our journey we alternated between walking through rainclouds and dealing with intense sun. Haleakalā may be one of the few 2-day hikes where sunscreen and a rain jacket are equally necessary.
Day One: Haleakalā Visitor Center to Palikū Cabin (8.9mi)

A view of the crater from the Haleakala summit 
The endangered and endemic Hawaiian silversword 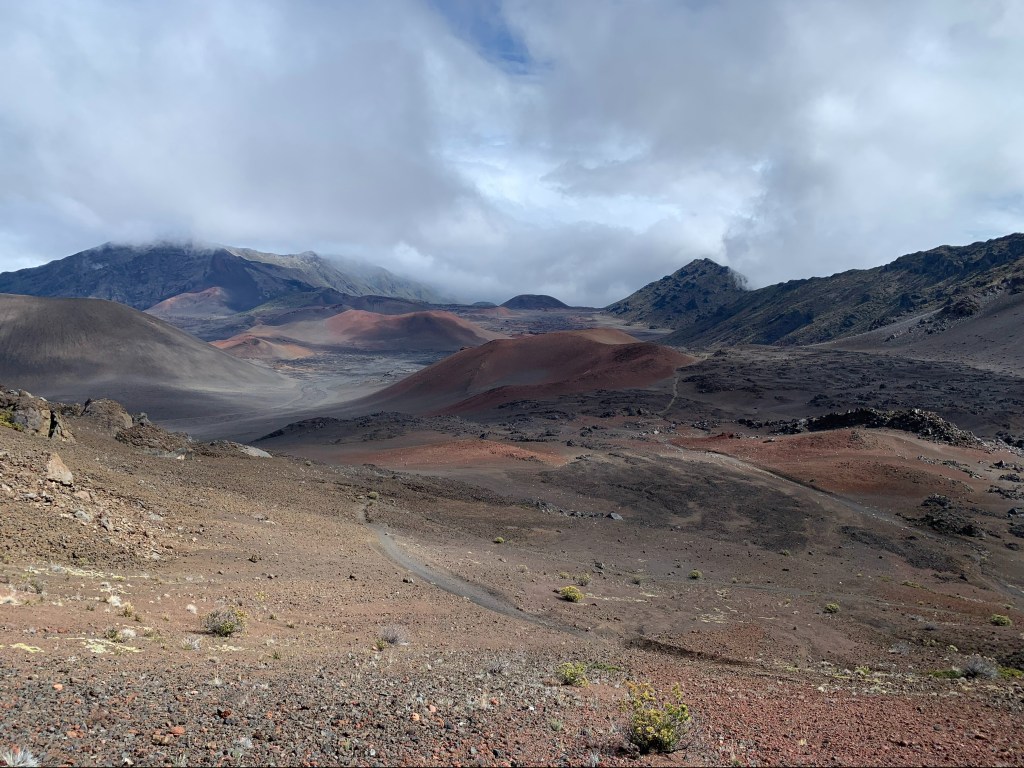
The descent into the crater 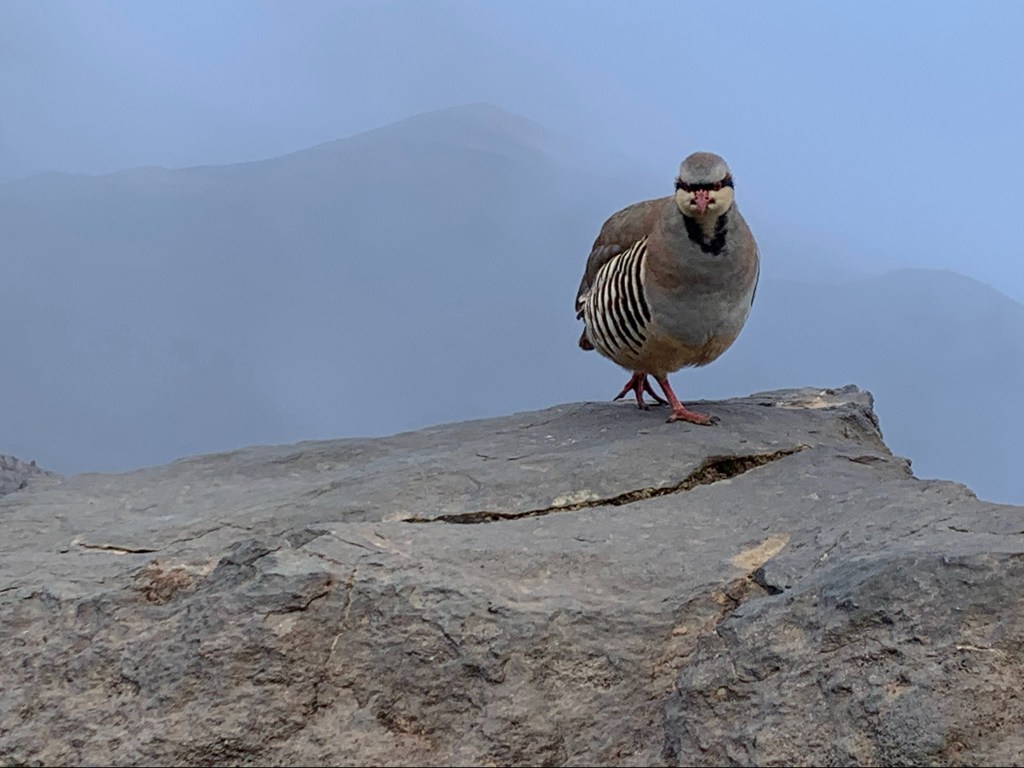
A fearless chukar, game birds introduced to Hawaii in the 1920’s 
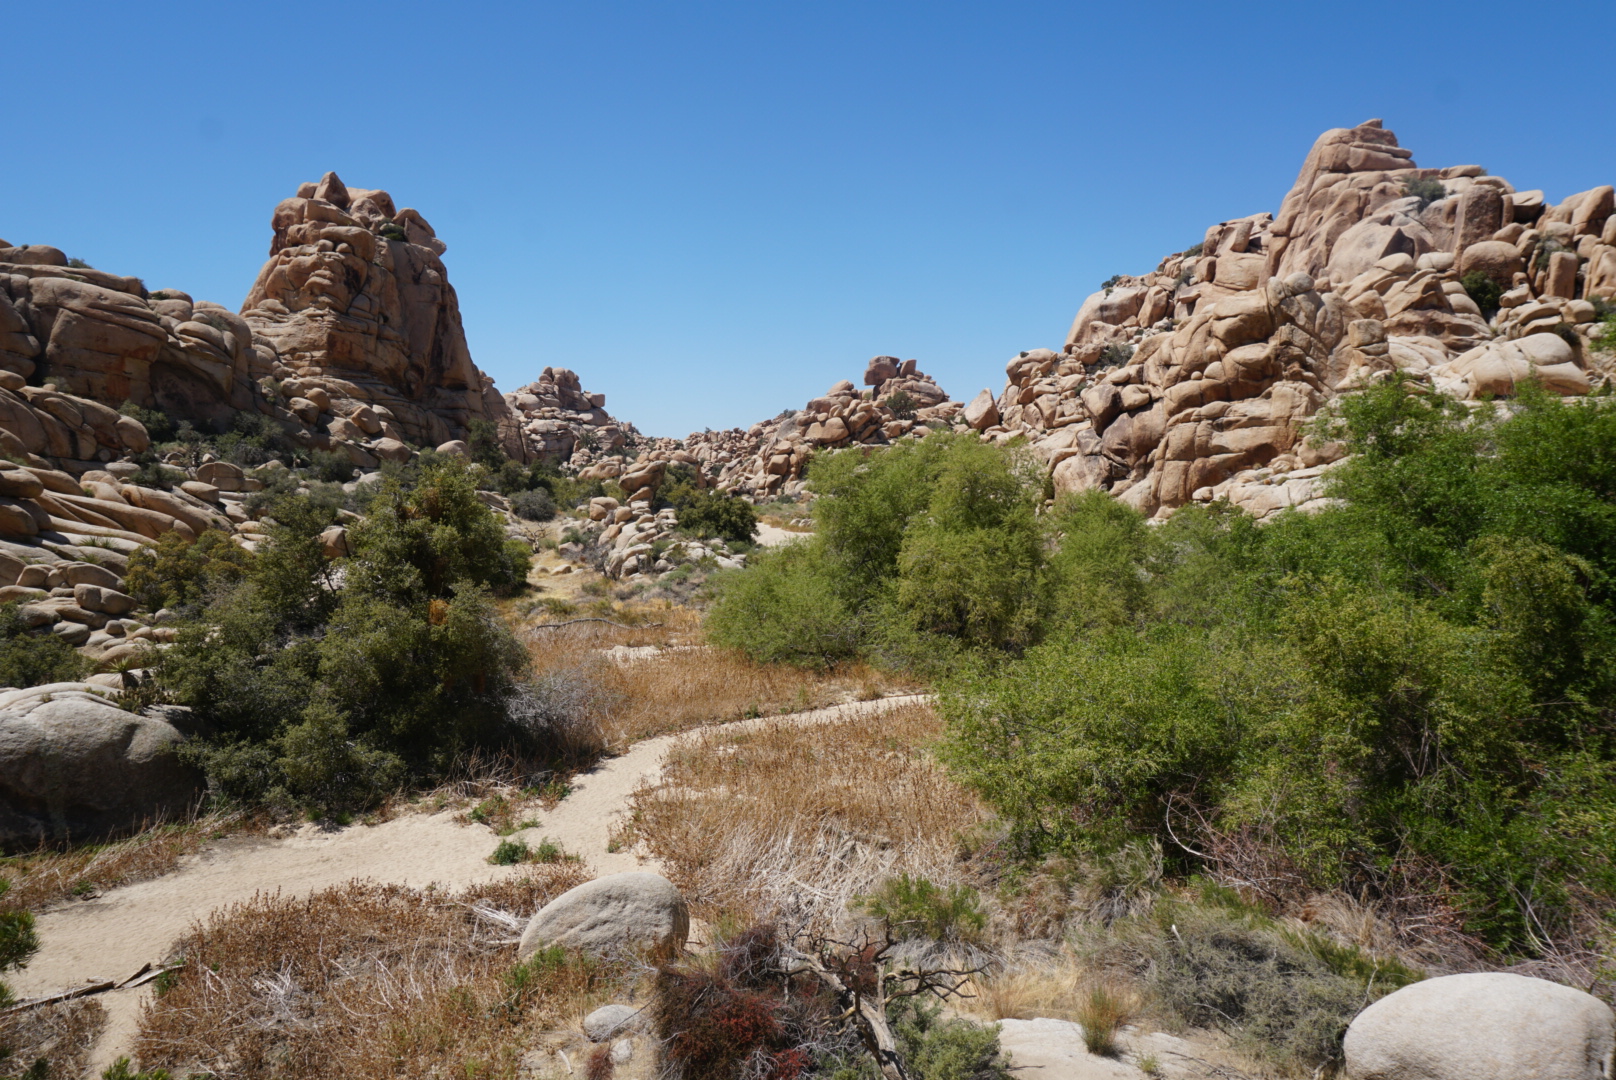
Traversing the crater floor 
A path through the lava rock 
Walking through a cloud 
The endangered Hawaiian Goose or Nene 
Approaching the Kaupo Gap 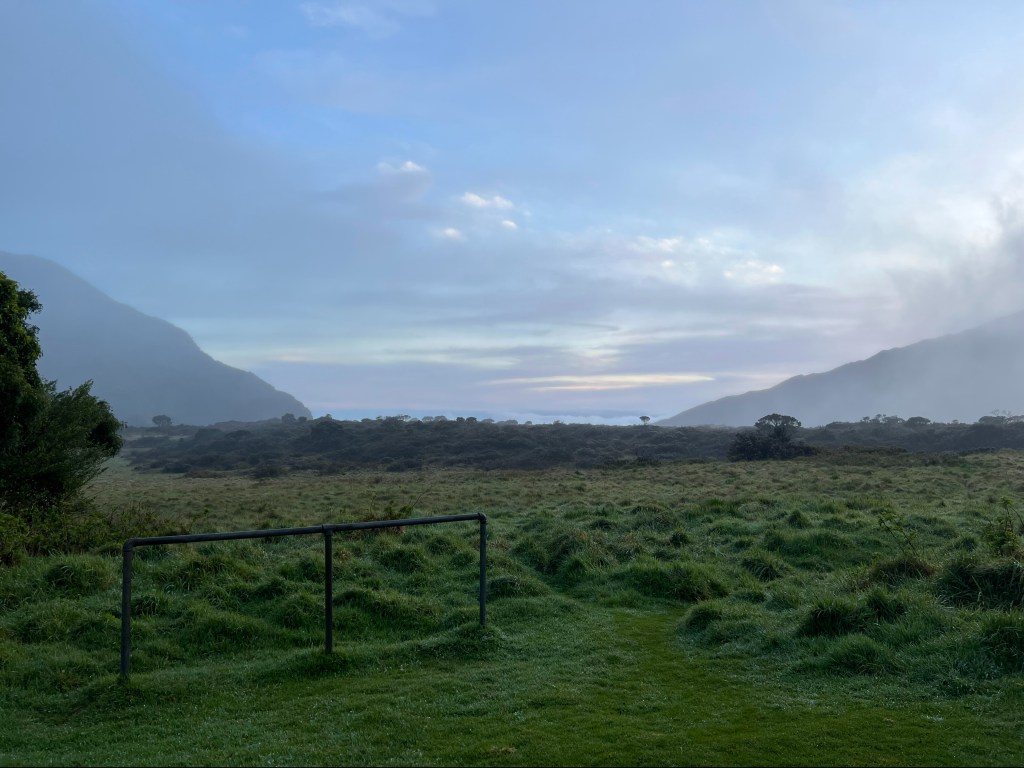
The Kaupo Gap from the Paliku Cabin
Our trip to Haleakalā started, like any other, at the crack of dawn. Though I conveniently had plans to bring my bag, tent, and other necessities with me on our trip to Hawaii (it was meant to be a restful little vacation before starting the AT), there were a handful of necessities that we had to purchase on island, most notably a Walmart sleeping bag for Emma. This proved easy enough, but did set us back an hour or two as we raced across the island and up to the top of the volcano. Winding our way towards the summit area by car, we passed a smiling hitchhiker holding out a crisp $20 bill. In an effort to build up some good karma, we stopped and gave him a free lift to the top. He had just finished a similar hike to the one we were planning and needed to get back to his car.
By the time we reached the mountaintop trailhead and had all our gear in order, it was around 1:00pm. As usual, we would be starting later than we had hoped. Fortunately, we were to begin with a few miles of downhill walking that afforded an opportunity to gain back some time. As we left the parking lot and stepped into the crater, we were struck by the same breathtaking scenery that had captivated us a couple of years prior. Thick clouds were swirling inside a melting pot of colorful stone. From above, the landscape looked smooth and coordinated. Clear lines separated red rock from brown, as if Pele herself had painted the volcano. Only as we descended could we grasp just how rough and inhospitable the landscape really was. Loose, sharp rock littered the crater floor and the ground was noticeably devoid of plant life, save for tiny wildflowers, scraggly bushes, and intermittent patches of the regal Hawaiian Silversword.
For those that have never seen a Hawaiian Silversword, they are a spectacular endemic plant evolved to survive in one of the harshest environments on earth. The endangered sub-species atop Haleakalā are only found on the volcano, generally growing in patches of green and silver rosettes where human or animal activity did not manage to wipe them out. As we descended deeper into the crater we could spot the dead and dry stalks of the select few plants that had bloomed earlier in the season. Silverswords may live up to 90 years and when their time comes, they go out with a final colorful display. A stalk covered in purple flowers suddenly emerges from the center of the plant and may rise as high as 6ft. before the whole plant dies and the seeds are left to scatter across the barren landscape. We had missed the bloom by a few months, but it provided a reason to return, just as our desire to sleep in the crater had driven us to back to the park this trip.
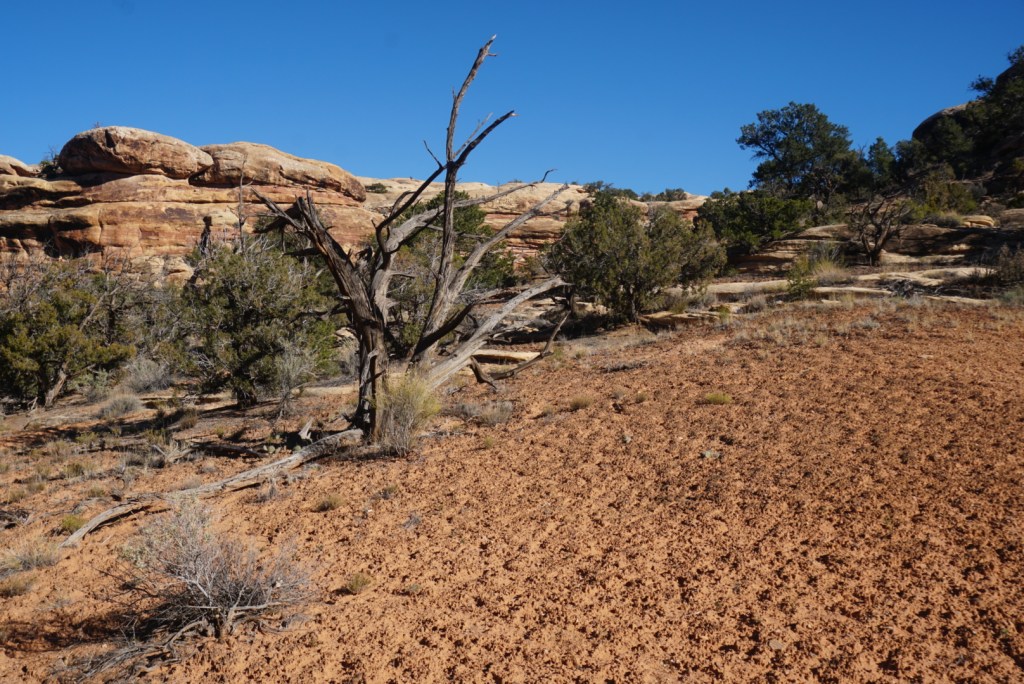
Having been to the crater before on a day where the weather was more cooperative, we hustled through the downhill section of the hike until we reached the bottom of the crater roughly four miles in. It was here a lone, weathered tree and a fork in the road marked the spot where we had turned around on our last hike. Only this time, we stayed true to the Sliding Sands trail and followed the signs towards the Kapaloa Cabin. This section of trail was pleasantly flat and remarkably barren. It was like an interplanetary journey between the smooth grey rock of the Moon and the ruddy orange of Mars. As we neared the cabin, there were two notable shifts in the environment. Firstly, thick clouds moved in that blocked out the sun and created the feeling that it was much later than it was. Though it never truly rained, it took minutes before everything we had was thoroughly soaked. We were like Silversword, pulling moisture directly from the clouds. The second gradual change was in the scenery. Near the cabin a layer of bleached green shrubs began to carpet the crater floor. As we passed further into the crater the undergrowth grew thicker. It appeared rough lava rock had taken the place of the dense volcanic ash on the crater floor, providing enough texture for plant life to gain a foothold.
After an hour of walking through a wet fog, the wind shifted and the cloud dispersed as quickly as it had come. Once again, we were trekking along under the blue Hawaiian skies, now enjoying a comparatively lush section of the trail. Within minutes the added visibility came in handy, for it allowed us to spot another one of Haleakalā’s rare, endemic species, the Nene or Hawaiian Goose. The mating pair was posing on a prominent lava rock, alert, but unperturbed by our presence. For minutes, we sat and watched the beautiful birds. Nene are the rarest species of goose in the world, and remarkable in that even though they are capable of flight, they almost never take to the air. This odd behavior obviously did not contribute well to their survival as colonization and globalization introduced hunting, feral cats, mongoose, and other threats to the islands. This drove the population down to around 30 birds by the 1950’s, though there are believed to be a couple thousand on the archipelago today.
Eventually, we bid farewell to our Nene friends and continued on our journey into the late afternoon. It wasn’t long before we encountered another goose, this one standing right in the middle of our path. He was considerably less friendly than the mating pair and refused to yield even as we patiently waited for the right of way. After a few minutes, we nervously shooed him off trail and continued on towards the Kaupo Gap. After rounding a sizeable cinder cone and making a small descent, we arrived in the gap. It was like a scene out of Jurassic Park. Tucked in amongst imposing, sheer cliffs was a small cabin surrounded by lush foliage. A thick grove of trees hugged the wall and crowded into small ravines as far up the escarpment as they could reach. A thin layer of fog hung in the valley, creating a spooky effect as the sun dipped below the walls of the caldera. We set up our tents then poked around a bit and chatted with our neighbors staying in the cabin. While conversing, a family of six Nene waddled out of the tall grass and began feasting on the green shrubs along the trail.
Darkness comes quickly atop Haleakalā and with it came a thick layer of clouds that brought a chill to the crater floor. We stayed up as long as we could in hopes of catching a magnificent starscape, but eventually drifted off and fell into a deep, well-earned sleep. It had been a long day, and we had an early morning ahead of us. We also were fully aware that we would need to earn back most of the 3,400ft. we had descended.
Day Two: Palikū Cabin to Halemau’u Trailhead (10.1mi)

Retracing our steps across the lava flow 
A distant view of Mauna Kea on The Big Island 
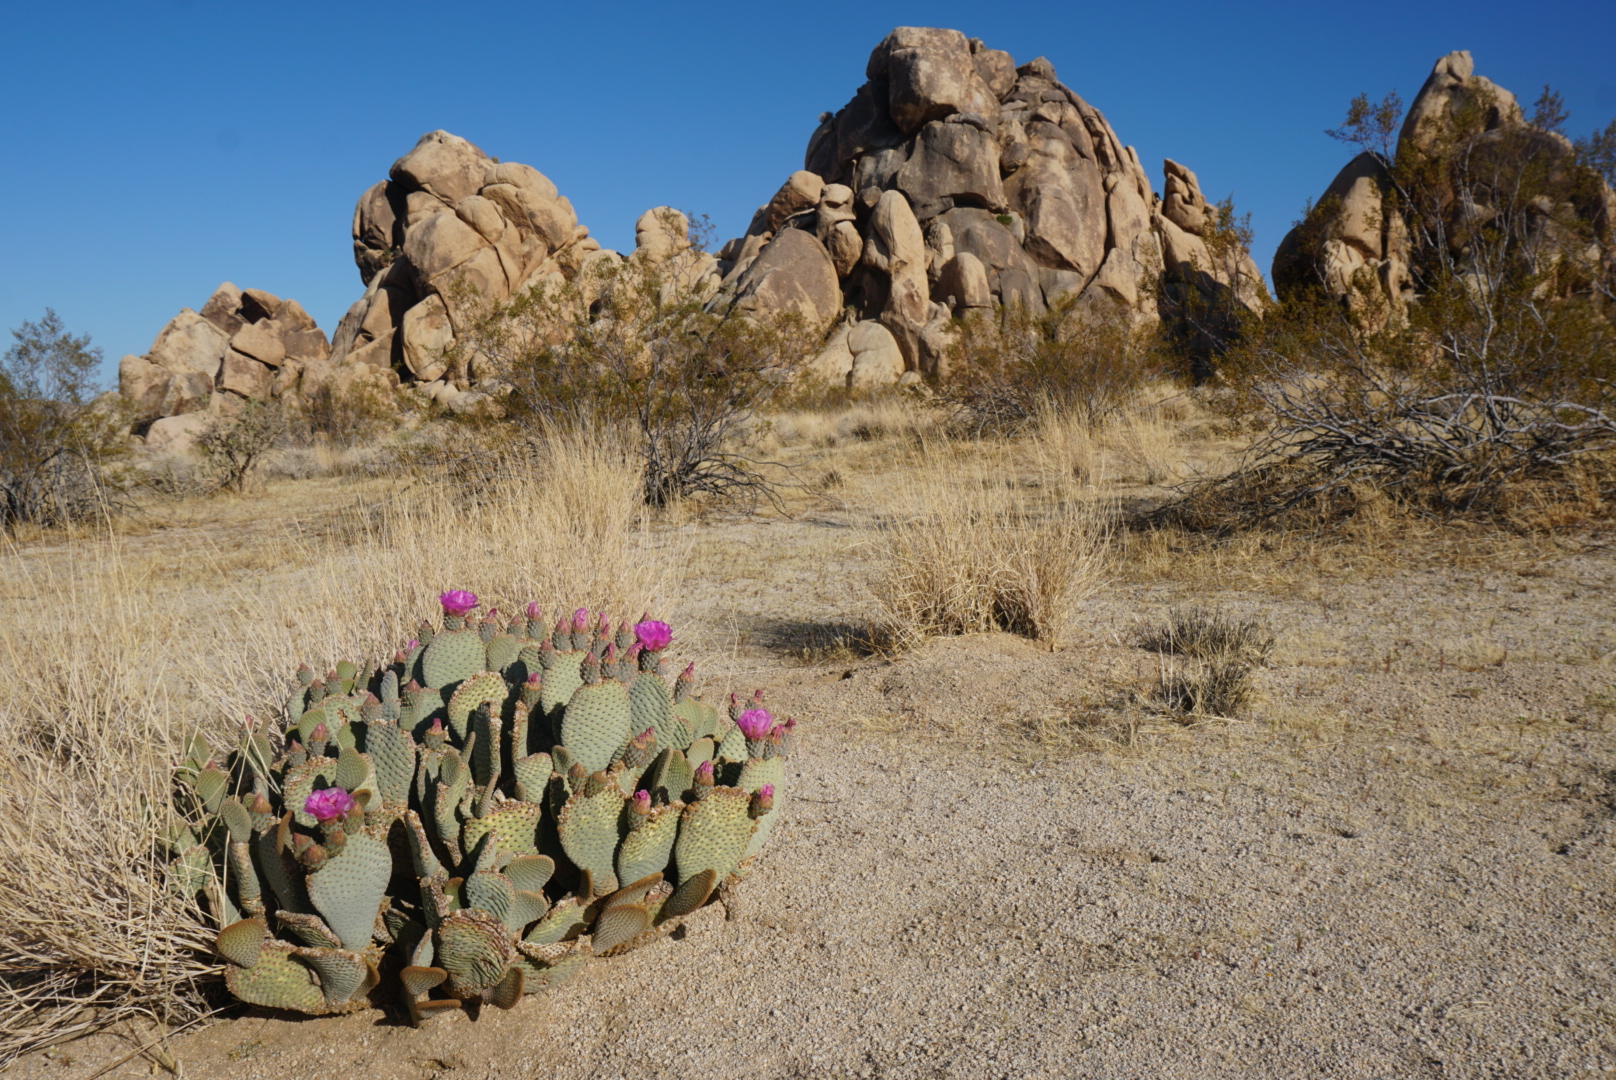
The rocky eastern section of the crater floor 
Re-entering the main crater 
The famous “paint pot” 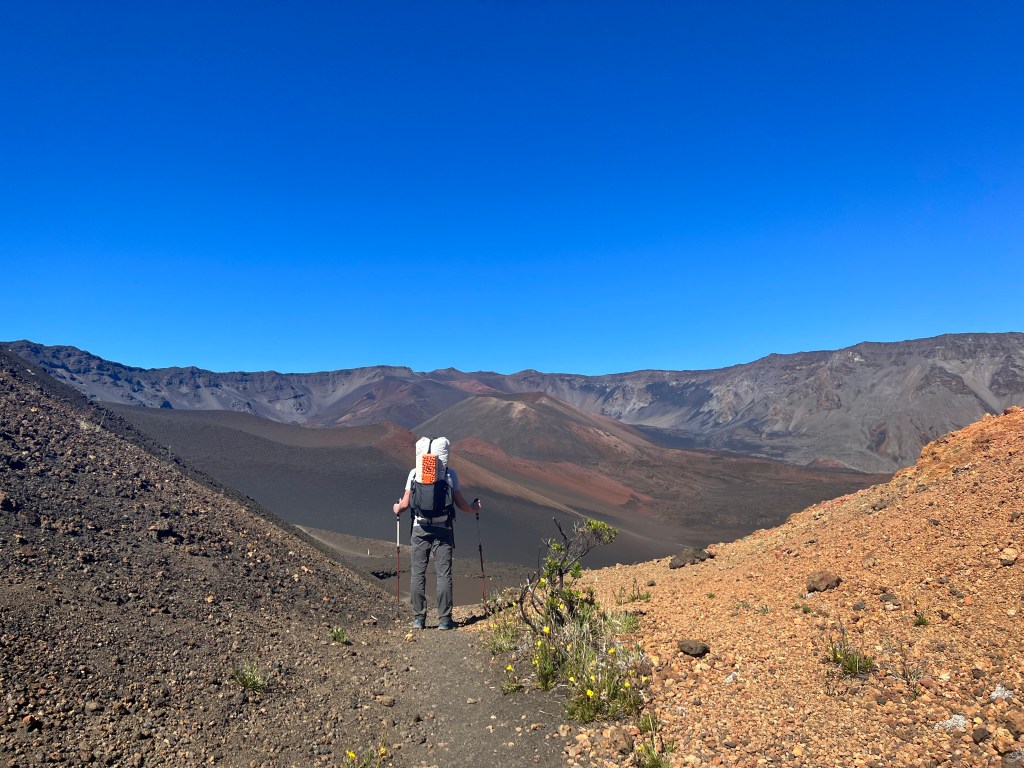
Panoramic views just beyond the paint pot 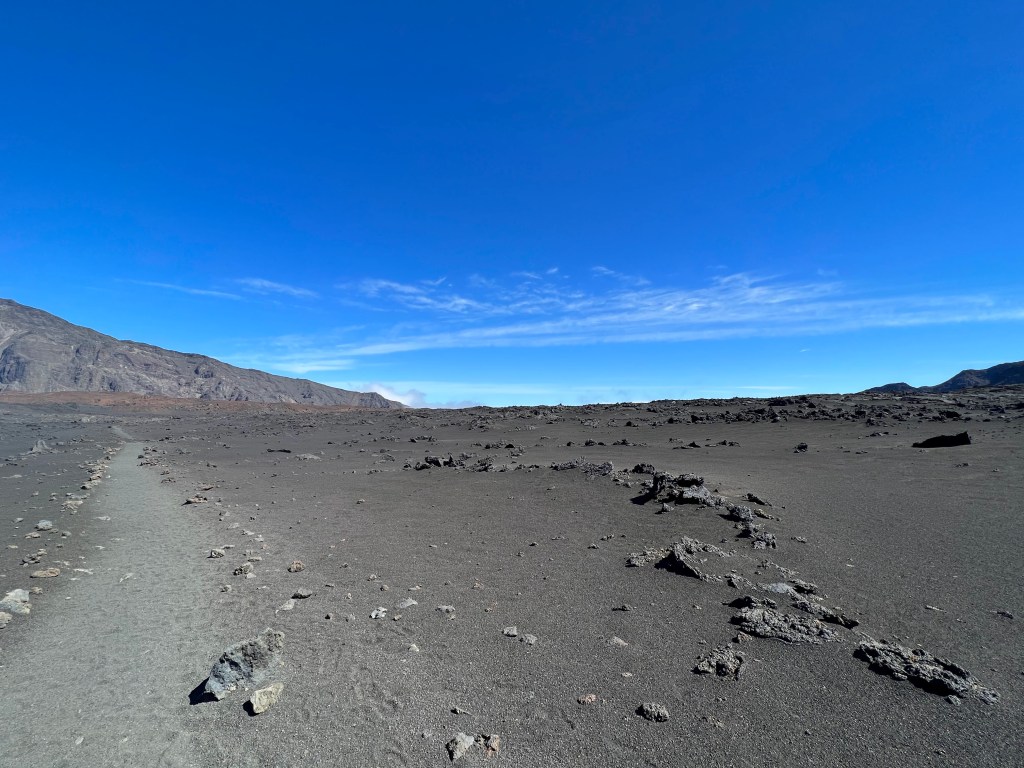
A particularly barren section of the crater floor 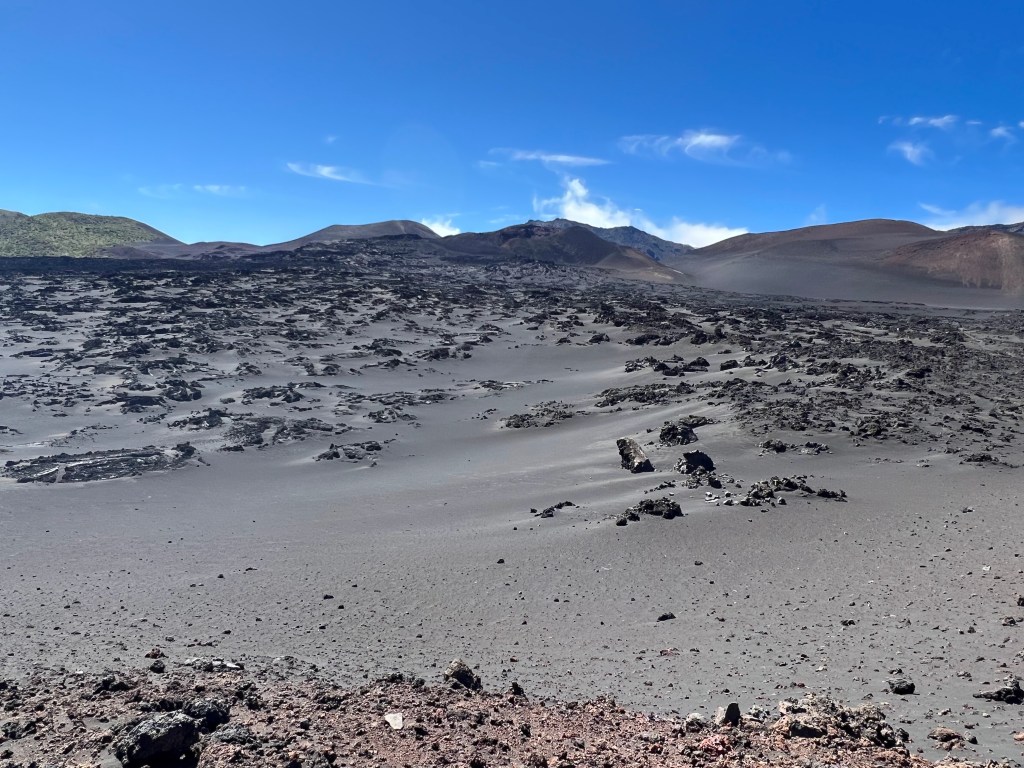
Looking back across the lava flow 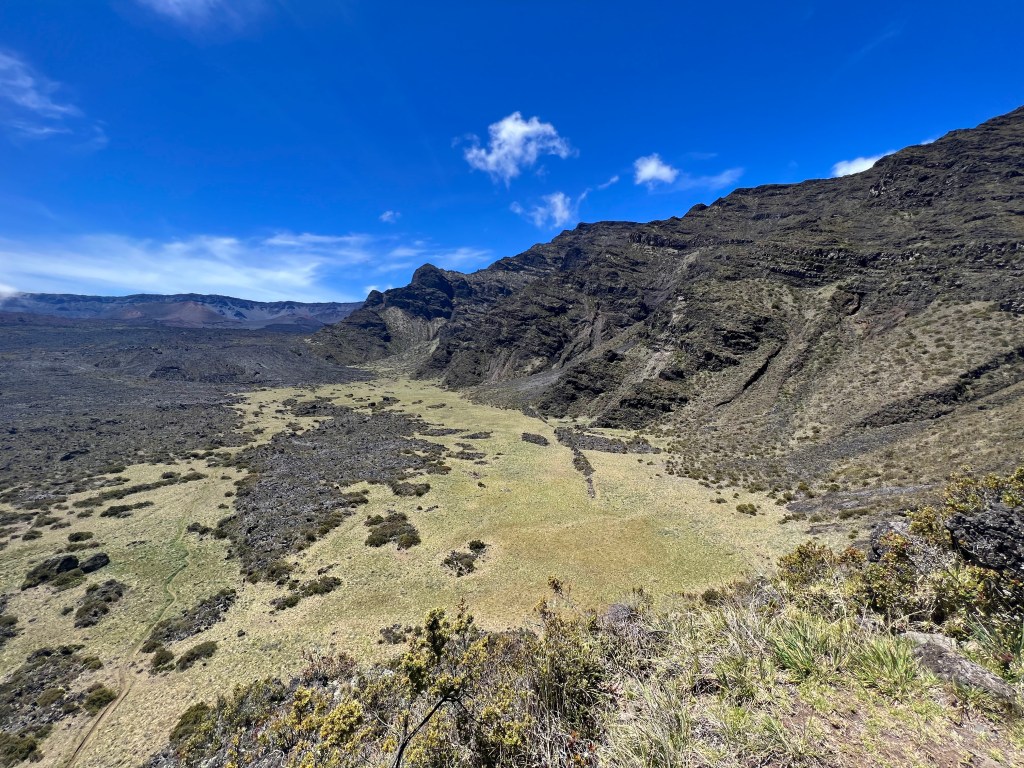
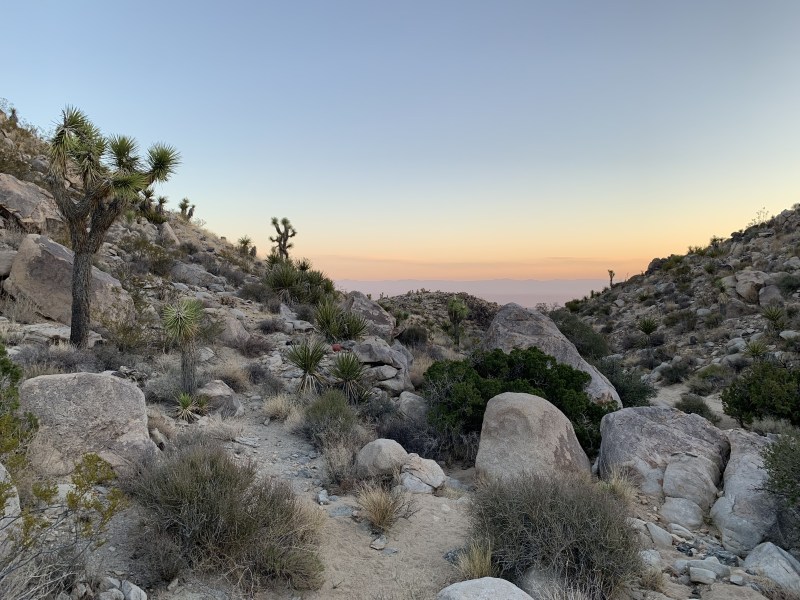
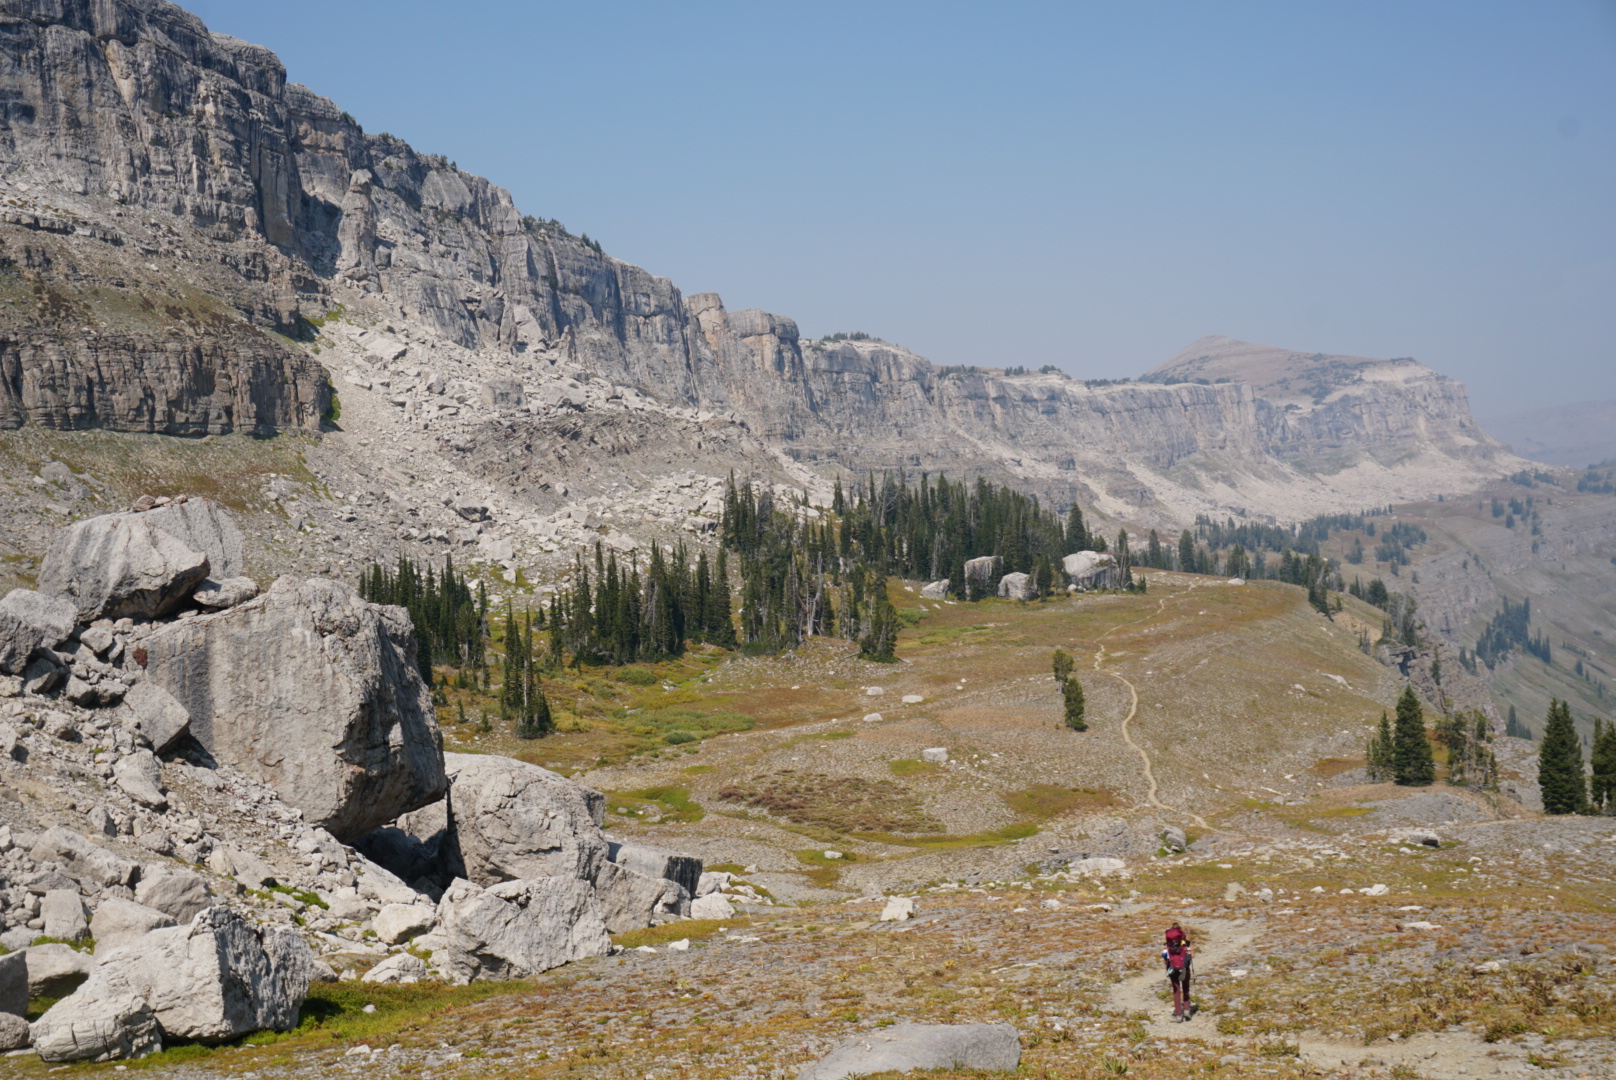
The harrowing ascent out of the crater 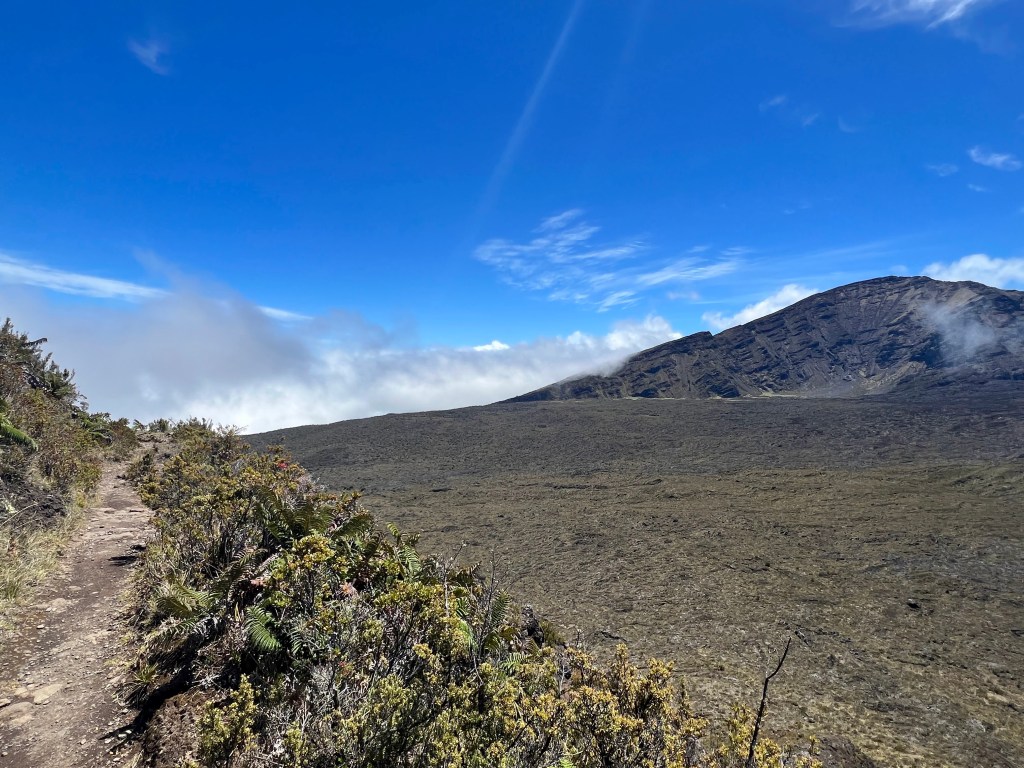
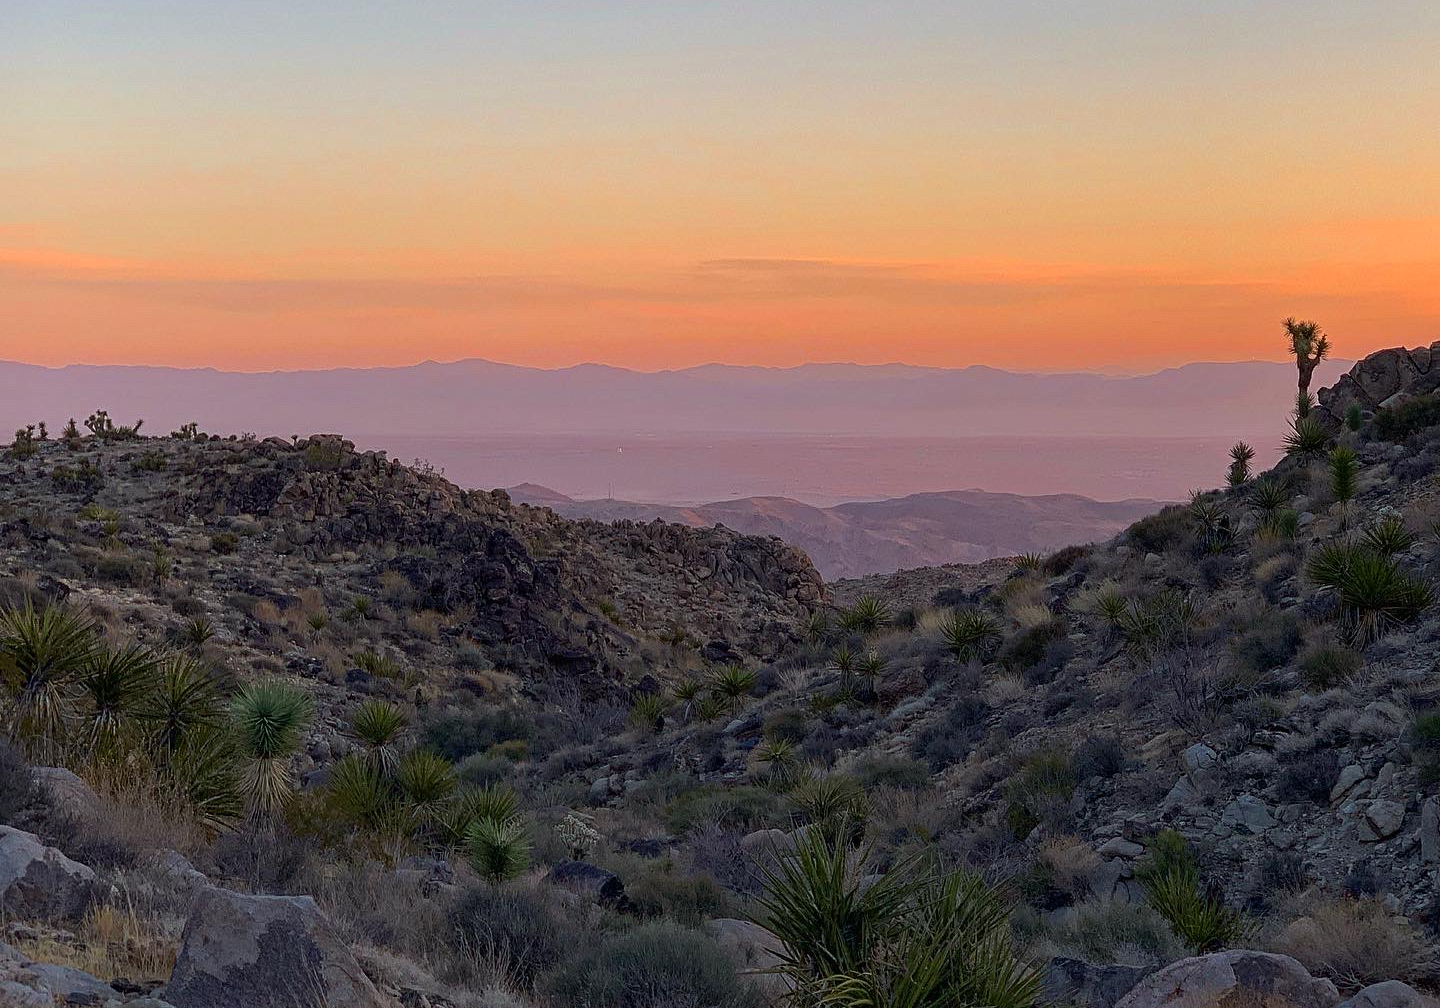
A view of the “world’s end” from the final section of the hike
At some point in the middle of the night, I stirred enough to remember to poke my head out of the tent and take a look at the sky. The Hawaiian volcanoes of Haleakalā, Mauna Loa, and Mauna Kea are known as some of the best spots in the world for stargazers, and I was blown away by what I saw. Though a layer of fog prevented a full view of the sky, a couple clear windows were filled with a dazzling display of stars. It was a difficult feeling to describe, one that I find myself in pursuit of on backpacking trips. In a quiet, remote location surrounded by natural beauty, I felt for second as if I was the only person on Earth. Eventually the chilly mountain air drove me deeper into my sleeping bag and back asleep.
Our hiking day started with the calming sounds of the morning breeze on our rainfly and a thousand little songbirds singing their way up and down the escarpment. Hoping to get some beach time in later in the afternoon, we took down camp quickly and departed early. There to greet us on the trail was the same angry Nene, approximately a mile out from the Paliku Cabin. This time he was even more steadfast in his aggressive defense of the trail. As we cautiously approached hoping to shoo him off, he hissed like a cat and beat his wings. It was quite possible he’d chosen a poor, high-traffic spot for a nest, but this gave us even more reason to stick to the trail. Eventually, I worked up the courage to bluff charge the brave bird, and he stepped off trail just far enough for us to scurry through.
With a little boost of adrenaline to wake us up, we retraced our steps around the O’ilipu’u cinder cone and back to the green covered lava fields. The terrain in this section was particularly rough, and while carefully watching our feet to avoid a tumble onto the sharp rock, we almost forgot to look back behind us. When we did, we were amazed by what we had seen. The morning fog had retreated, and now the clouds hung at the top of the escarpment. Periodically, a gust of wind would spill the white mist over the edge of the cliffs and into the crater, where it would quickly dissipate into nothing. The blue skies also provided a clear view through the Kaupo Gap, across the Pacific Ocean, and all the way to Mauna Kea on the Island of Hawaii approximately 100 miles away. It was a sight to behold.
Pushing forward again we took a right turn at the junction and hopped on to the Halemau’u Trail to explore a section of the park that was new to us. Compared to other areas of the crater it was particularly rough and rocky. In fact the trail led us across sections where the ground was so rough that plant life appeared unable to conquer it. As we gradually pushed uphill, however, the trail smoothed out and eventually we found ourselves back on the smooth Martian rock that we had looked out over from the top of the volcano the afternoon prior. This allowed us to pick up the pace again, and soon we were passing by Haleakalā landmarks such as the ‘Bottomless Pit’ (aka Kawilinau, a 65 ft. deep lava tube) and ‘Pele’s Paint Pot’ (a hillside smeared with streaks of particularly vibrant colored lava rock). The best part was, since we got an early start we had the crater and landmarks to ourselves. The day’s visitors still driving the long road to the summit or starting their long descent into the crater via the Sliding Sands Trail.
It wasn’t until we passed the Silversword Loop and reached the Holua Cabin that we finally encountered some other hikers. There we stopped to filter some water and have a snack. It was late morning by this point and starting to heat up. There was no semblance of shade in the crater so we packed a little extra water and hit the road, hoping to complete our climb out of the crater before the temperature neared the daily highs. Beyond the cabin, the trail led us through one of my favorite sections of the park, where an ancient lava flow had cascaded across the crater floor and spilled down the side of the volcano. We walked alongside imprinted lava tubes and bubbles of solid rock, staring out over the Ko’olau Gap. From where we stood, a flat plain seemed to stretch for another mile or so until, abruptly, the world ended. As we began our steep climb up the walls of the crater, the effect became even more pronounced. It was as if the edge of the Earth stood before us, go over it, and you would just disappear into the clouds below.
Though just about 2 miles from the parking lot, our work for the day had really just begun. We were facing a climb up to the crater rim across a brutal stretch of switchbacks rising well over 1,000ft. in elevation. It was hot out at this point but we powered through, fueled by ever more expansive and impressive views of the crater below. Covered in sweat, we eventually reached an viewpoint known as the Rainbow Bridge, and for the final time admired the crater from which we had come. Satisfied and feeling accomplished, we hiked a gradual half mile out to the hiker pick up point and started hitchhiking. Within 10min, a convertible pulled over with a family inside. They only had room for one, so I grabbed the keys and hopped in for an enjoyable open air ride on a sunny day. A thick layer of clouds covered the lowlands, but we towered above. If felt like I was riding on the wing of an airplane. At the top, I bid farewell to my knew friends, grabbed the car, and began a long ride back to society, picking up Emma along the way.
Alternate Itineraries
There are a web of trails that cover the Haleakalā Crater and create several opportunities to customize your route. The primary decision one has to make is where to finish your hike. We elected to optimize for both scenery and simplicity of logistics by wrapping at the Halemau’u Trailhead. That being said, you could finish at the other trailheads
- Summit (Keonehe’ehe’e Trailhead): This option makes the trail a true loop and removes the need to hitchhike altogether. It does however, bypass the Hōlua Cabin and Ko’olau Gap wilderness area entirely which is a very scenic and unique part of the crater.
- Hosmer Grove Campground: Finishing at Hosmer Grove increases the route length, but does make for a potentially difficult hitchhiking situation as the trailhead is off the main route to the summit.
I should also note that one can also begin their hike at any of these three trailheads. In fact, beginning at the Halemau’u Trailhead is commonplace as it allows hikers to knock out the steepest section of the trail while going downhill. Still, I strongly recommend beginning at the summit as the descent into Haleakalā crater is magical.
Alternate route – Kaupo Gap: A significant variation on the route is to follow the Kaupo Gap Trail from the Palikū Cabin down the mountain and to the coast. This allows for exploration of a new section of the park and provides the satisfaction of going all the way from summit to sea, or sea to summit if you prefer a masochistic climb. Fair warning, much of the Kaupo Gap trail is outside the National Park boundary and is known to be poorly marked and maintained. It also is a bit of a logistic nightmare as the Kaupo region is notoriously difficult to get to from the more populated parts of the island. While we originally set out to follow this route, we were dissuaded after reading accounts such as the one by Halfway Anywhere.